I love comments. If you like my work or download one of my files, please leave me a comment and let me know.

Thanks and happy crafting.

Monday, June 29, 2009

Card Class #6

This class introduced the Envelope Card. The ladies did a wonderful job with them.

By Jenny


By: Sara


By: Kate


By: Mellie


SpongeBob Square Pants

I finally got to try out my new cart today. I love it!


Scal Tutorial Part #2

Downloading and Cutting Files from others

Have you seen files on someone else's blog that you would like to use but have no idea how? We will be going over this with today's tutorial.

Step 1: Find a blog with a file that you would like to download. (Make sure that you have permission and leave a comment thanking them.) I have plenty on my blog that you may use.

Step 2: Most blogs have the name of the files in bold print. If you click on the name it will bring you to a download page or download box. Click on either the download button or the save button depending on the options you are given. This will save the file to your computer. Mine saves them to the desktop. It is important that you know where your file is going.

Step 3: Open scal. The file you downloaded is in one of two forms. It is either a scut file or a svg file.
If it is a scut file then you need to go to file, open and choose your downloaded file.
If it is a svg file then you need to go to file, import and then choose your download file.
You should now have the file on your cutting mat inside of a red box.

Step 4: Sizing - you can size your file two ways.
One - you can use the bottom right hand arrow key to stretch or shrink your file.
Two - you can change the size of your item by typing the size into the properties box. You will find the width and height section underneath the nudge buttons.

Step 5: Shadowing - if your file didn't come with a shadow you can create one. Just follow the shadowing directions in the last tutorial.

Step 6: Cut paper to fit each piece of your file. Most files will have several different pieces shown on the cutting mat at one time. This is because scal doesn't offer different tabs like design studios does. Simply follow the grid on your mat to cut each color of paper remembering that each square equals one inch.

Step 7: Using your vertual mat as a guide, place your pieces of paper on your cutting mat.

Step 8: Load your mat into your cricut and click on the scissors to cut it out.

There are lots of free files you can download all over the internet. Please make sure that you thank the person that you get the file from. These file can take a long time to make and it's nice to know that they are appreciated.

Tomorrow we will start with making our own cut files using Inkscape. Inkscape is a free download. You can find it here: Inkscape download.

Reminder!

Our 7th card class is tonight on the pieces of paper forum! Don't forget to stop by and play with us!

Sunday, June 28, 2009

Scal Tutorial Part #1

Several of my friends on the pieces of paper forum have ask for help using the Sure Cuts A Lot (scal) program. I have decided to do one tutorial all day this week. If you have any questions or suggestions please let me know.


Welding and shadowing words.

Scal makes it easy to weld and shadow words. You can cut any font that you already have on your computer. Some of the thinner or fancier fonts are more challenging. If you find some that are a problem for you, try making them a larger size.

Step 1: open the library box. You can find it by clicking on windows and then fonts. You can also use control 2 as a short cut.

Step 2: scroll through your library and pick a font that you would like to cut. In this box, you will also be able to choose size and if you want bold or italicized letters.

Step 3: click somewhere on your cutting mat and type your word

Step 4: Welding - double click on one of the letters in your word and move it left or right so it is touching the letter next to it. Do this with all of your remaining letters.
Open the shapes properties box. You can find it by clicking on windows and then shape properties or by using control 1.
While your word is highlighted (you will see the red box around it), click on the weld box in the properties box.
At the top of your screen is an icon that looks like a magnifier. When you click on this it will highlight in red where your cuts will be. This is a good way to double check what you did. There should be gray areas where the letters overlap. These will not cut.

Step 5: Shadowing - this will work if you want to shadow and individual letter or an entire word.
Highlight the item that you want to shadow. You should see a red box around the item.
Click control c and then control v. This will give you a copy of your item. You will need to move it to another area on your mat. Make sure that you only use the arrows in the top left corner, middle of the top or middle of the left hand side to move your item. If you use the other arrows, you will alter the size of your item.
Now that your copy is moved and highlighted, go to the properties box. In the top of the box you will see a spot called "style". It should say normal right now. Using the arrow, scroll down until you have selected shadow. Did your letters get fatter? They should have.
To the right of the "style" spot, you will now see a box with a number in it. Scal allows you to choose how much of a shadow you would like to have. One is the smallest and 3 is the largest.
While your shadow is highlighted, go to the properties box and click the weld button.

Step 6: I always preview my work before I cut it. This helps to prevent mistakes like not clicking the weld button. I have done that so many times!

Step 7: Load your mat with paper and put it into your machine. You will need a cartridge in your cricut in order to cut. It doesn't matter what cart you use.

Step 8: click on the scissors at the top of the page to cut. It will ask you what type of cricut you have. Choose the correct options for you and then click ok. It will ask you this every time you cut.


Thursday, June 25, 2009

Sorry

Sorry I've been so quiet the last few days. We are rapping up school here and it's been crazy. Today is finally our last day. I have the summer off! :) I'm working on a baby book for my cousin. I'll post some pictures when things calm down a little.

Monday, June 22, 2009

Voting

Please help my friend Jenny by going to her website and voting for your favorite card.

Thank you!

Hand Scal File

My friend Joyce on the pieces of paper forum needed a cut file of a hand. This is what I made for her: hand - scal file

Card Class #5 - Joy Fold Cards


The ladies get more talented as each week goes by! This week we learned how to make a "Joy Fold" Card. They are breathtaking!

By: Mellie


By: Christina


By: Sara


By: Laura


By: Kate


Did you know that Mellie and Sara are sisters? I just learned this today. Melly told me that her and Sara get together each weekend to make the weekly card. I am so touched! Thanks ladies. I'm glad to hear that you are enjoying the classes. I'm having fun with them too. I may do some in the future but not right away. I will be taking my in July. I may start up again in August when I get back.

Sunday, June 21, 2009

Don't Forget

Card class Monday night at 8pm est on the pieces of paper of forum. We will be making an Envelope Pocket Card.

Friday, June 19, 2009

Birthday Card


This card is made out of a size A2 envelope or an invitation size envelope. I used chalk, ink and stickles to enhance it.

stamps - Stampology "Flourishes V2"
carts - Animal Kingdom and New Arrival
paper - Reminisce "Funky monkey"
cuttlebug folder - Happy Birthday


Thursday, June 18, 2009

Father's Day Card

These are the last of my Father's Day cards!

I made this card for my stepfather.


Tie card - scal file
Tie - scal file


I made this card for my wonderful husband. I hope he likes it! The cut files include layers for the tools but I didn't use them for the card. Tip - If you don't want to use part of a scal file, just hang it off of the cutting mat!


Tuesday, June 16, 2009

Mosaic layout directions

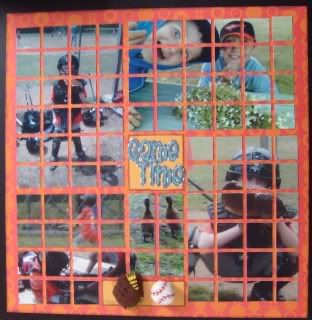
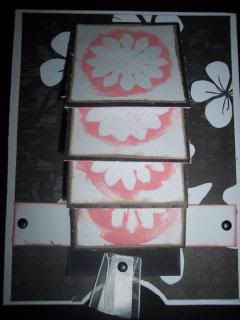
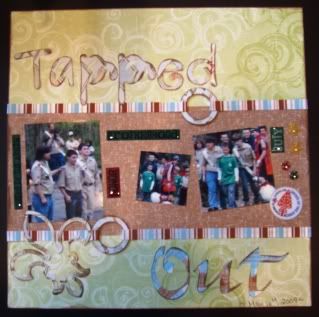
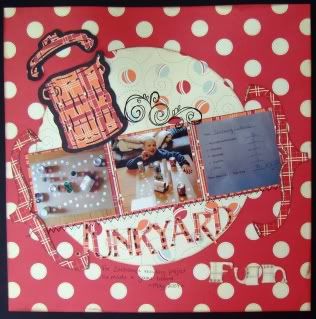
Several people have asked how I made my mosaic layout so here are the directions.

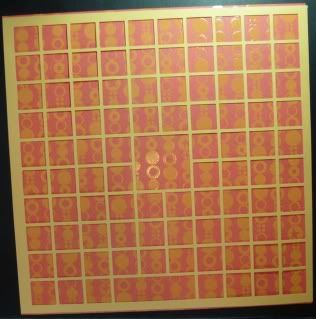
The first thing I did was to cut the base out of a heavy cardstock. I do not use this on my final layout so the color doesn't matter. (you can find this on tab #1 of my cut file)

Next, I taped my grid onto my background paper.


The next thing to do was to cut my photos. I was way to lazy to do this by hand so I made a cut file for this too. My photos were not true 4x6 so this did affect the final outcome. (tab #2 of my cut file)


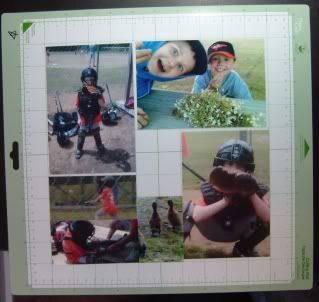
This is what my photos looked liked after I cut them out. Do not remove from cutting mat yet!
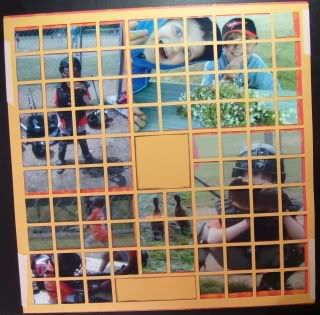


I removed 
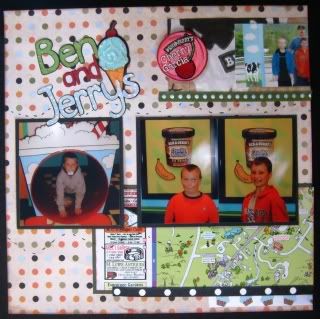
one photo at a time. I placed the pieces upside down on my work space in the same order that I took them off. I ran adhesive on the back off all the pieces. I then applied them to my background paper inside the grid squares.

I proceeded to do this with all of the photos.

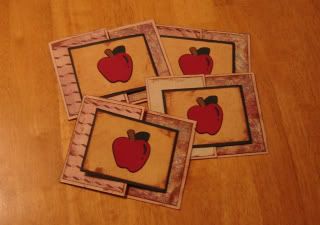
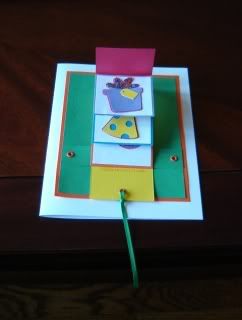
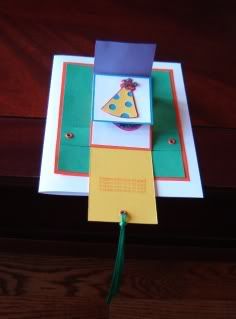
I cut embellishment boxes to fill in my empty spaces. (tab #3 on my cut file)


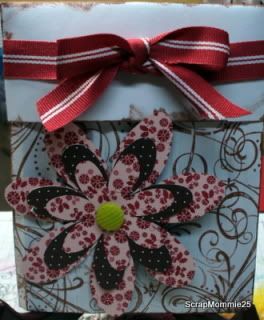
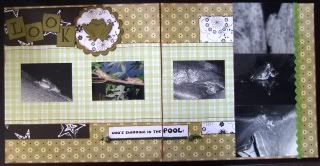
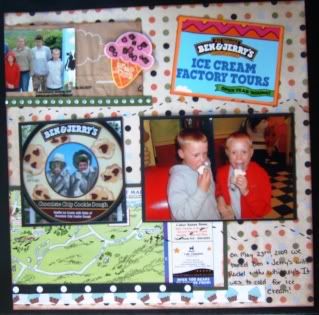
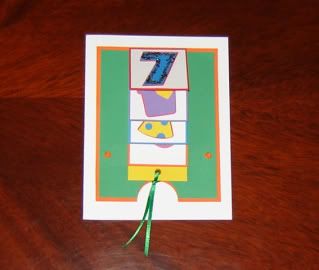
Carefully remove the grid from your background paper. Apply any and all embellishments.


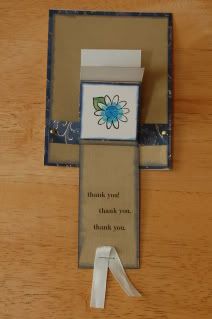
That's it. They are not really hard to make just time consuming. I wouldn't recommend making one when you are tired.

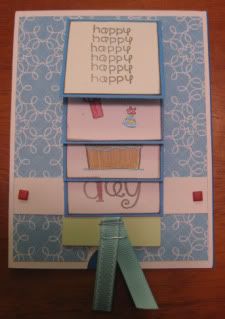
If you make one, please email me a picture or leave me a link in your comment. I would love to see your work!

Mosaic - ds cut file


Monday, June 15, 2009

Card Class #5

Tonight we made Joy Fold Cards on the pieces of paper forum. This is my card. The inside says "Friends are the chocolate chips in the cookies of life."


My crazy life!

We opened our pool last week. It was crazy. We had to remove around 12 frogs from our pool cover in order to remove it. Once we had the cover off we found hundreds of tadpoles in the pool. We have a salt water pool and I didn't think that frogs liked salt water. We waited until June to open our pool this year. I guess we are going to have to open it earlier next year no matter how cold it is.


Scalloped circle - scal file

Ben and Jerry's

These are from our trip to Ben and Jerry's on Memorial Day weekend. It was way to cold to eat ice cream but DH and the boys didn't seem to mind! :)

This sketch is a new one from scrapsketch so check them out!


Mosaic Layout

This was my first time trying a mosaic layout. I think it came out ok. I made a stencil using design studio. The stencil helped a lot!


Card Class Tonigh!

Don't forget to join us on the pieces of paper forum at 8pm est for a card making class. We are going to have to much fun!

Sunday, June 14, 2009

Waterfall Cards

Our fourth card class was last Monday and we made waterfall cards. The ladies made the most amazing cards. Check them out and join us for our next class.

By: Kate


By: Sara


By: Christina (Have you noticed that Christina has made every card so far?!)


By: Mellie


By: Laura


By: Jenny


By: Steph


Card Class Tomorrow Night

Don't forget to join us on the pieces of paper forum for our weekly card class. This week we will be making joy fold cards. See you there.

Friday, June 12, 2009

Card Class #5

The shopping/gathering list has been posted on the forum. Sorry this is so late. The week kind of got away from me!

Tuesday, June 9, 2009

Baby Crib

Here is a crib file that I made for my friend Joyce. I haven't cut it yet so if there is a problem please let me know.

Scal files

I recently taught a class on how to make waterfall cards. I made scal files to cut the pieces. I couldn't put it into one file so you need all three files to make the card.


Tapped Out

Challenge #7: Use at least three pictures on your layout.

sketch - scrapsketch #58
paper - Papa "hero", Daisy Bucket "Star Crossed and Driftwood"
carts - accent essentials and george
fonts - lindsay cutup and super calligraphix


Three New Cards

Challenge #8: Make three different cards.

I made these cards for Anthony's baseball coaches. We put a Dunkin Donut gift card in each one.


Junkyard Fun

Challenge #6: Build-a-Page

I used 3 squares, die cuts that were at least 5 inches, 3 inches, and 2 inches tall, stitches and two different carts.

sketch - scrapsketch #64
paper - Cosmo Cricut "jumping jack, cheeful charlie and silly sam"
carts - george and sesame street
fonts - light foot and ld plush


Cuddle Bugs

Challenge #5: This was a sketch challenge and to use foil on the layout.

sketch - scrapsketch #65
paper - Karen Foster "Bowls and Bones", Bo Bunny "Pet Shop Words" and Reminisce "Dog"
carts - paper pups
fonts - KF Twirl